There are various tools available to create a bootable USB disk for Windows 10. A bootable USB disk can also be made without any third-party software but needs basic knowledge of MS-DOS. Once a bootable USB drive is created, you can check whether it is bootable or not with MobaLiveCD without installing it on your computer. If you don’t already have Windows 10 ISO, you can download it officially using Windows 10 Media Creation Tool.
This post will see how to create a bootable disk using third-party freeware Rufus. Rufus stands for Reliable USB Formatting Utility with Source. It is a free and lightweight utility for Windows PC that helps you easily format and create USB drives. With the help of Rufus, you can create your own bootable USB key or USB pen drive for Windows Installation.
Rufus has a user-friendly interface and provides options to choose between the device, partition scheme, file system, cluster size, target system type, and new volume label. Under file system types, you can select from NTFS, FAT32, exFAT, and UDF.
Using this Rufus tool, you can create a label and check devices for bad sectors, quick format mode, and icon files. A bootable disk can be created using the ISO image, FreeDOS, or DD Image. Rufus records all the activities and saves them as a log file.
How to create a Bootable USB disk for Windows 10 using Rufus?
Note: During this process, your USB drive will be formatted. So, take a backup of your important data before proceeding with the steps.
To make a bootable USB disk for Windows 10 through Rufus, follow these steps:-
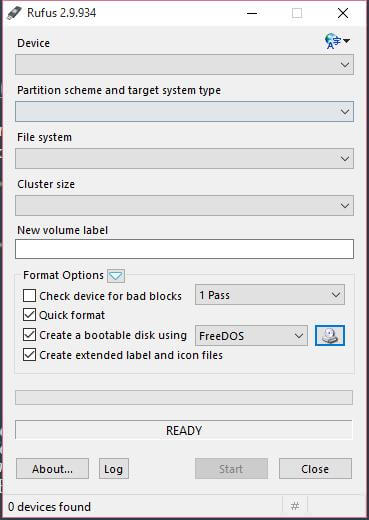
Step 1. Download and run the Rufus; since it is a portable file, there is no installation required.
Step 2. Connect the USB device to the PC (at least a 4GB capacity USB drive is recommended).
Step 3. Once the USB disk is inserted into the Windows PC, and it will automatically select recommended settings. If not, then select the device, ‘partition scheme and target system type’ (MBR partition scheme for BIOS or UEFI), ‘File system’ (NTFS), ‘Cluster size’ (depends upon your external drive), Label (You can edit as you wish), ‘Quick format,’ ‘Create a bootable disk using’ (ISO Image) and ‘Create extended label and icon files.’
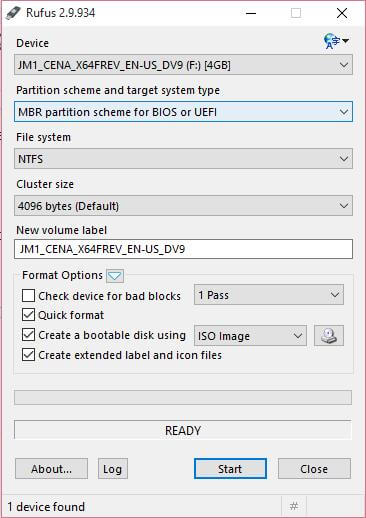 Step 4. Once the above settings are ready, click on the ISO icon.
![]()
Step 5. In a new window, locate the ISO file of your Windows 10 operating system.
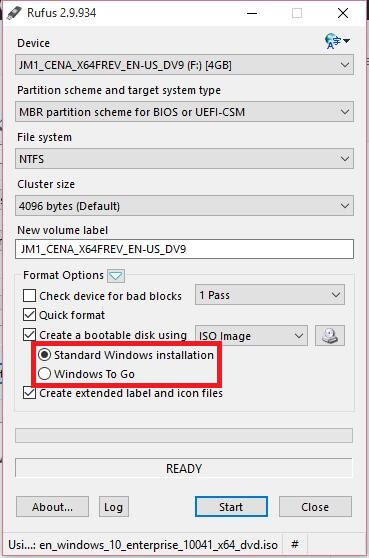
Step 6. Once ISO files of the operating system are selected, you will see two options ‘Create a bootable disk using’ – “Standard Windows installation” and “Windows To Go.”
Select “Standard Windows installation” and click Next.
Step 7. Wait for finishing.
It will take time according to your USB drive and PC speed.
Once the bootable installation USB disk is ready, reboot the PC, change the BIOS settings, and install the new operating system or repair it as you wish.
Conclusion
In conclusion, creating a bootable USB disk for Windows 10 using Rufus is a straightforward process that allows users to easily format and create their own bootable USB drives. Rufus offers a user-friendly interface and provides various options for customization, including choosing the device, partition scheme, file system, and more. By following the steps outlined in this post, users can successfully create a bootable USB disk and use it for Windows installation or repair purposes. It is important to note that the USB drive will be formatted during this process, so it is recommended to backup any important data before proceeding. Overall, Rufus is a reliable and efficient tool for creating bootable USB disks for Windows 10.


