Like Windows Vista and Windows 7 / 8 / 8.1, when you install Windows 10 operating system on a PC or run it for the first time (if it comes pre-installed with the computer/laptop), you create a new user account during that process. This newly created account works as administrator by default, but this is not the only one created during that process. Windows 10 creates two additional user accounts automatically, but both remain disabled by default, namely guest and administrator.
The guest account is for those users who access the device but don’t have a permanent account. Guest accounts have limited access as they cannot install software or hardware or modify system settings.
The superpower account is Administrator, which remains inactive by default. While it is not required, but it is often used for troubleshooting or administrative purposes.
What is the difference between a created administrator user account and an inbuilt administrator account?
The main difference between the administrative account, which you create, receives UAC prompts, while the built-in administrator does not receive UAC prompts.
For any purpose, if you want to enable the default administrator account of Windows 10, you can proceed with further steps.
How to Enable the Hidden Windows 10 Administrator Account?
1. Run the Command Prompt as Administrator.
To do this in Windows 10, click “Start” and type CMD.
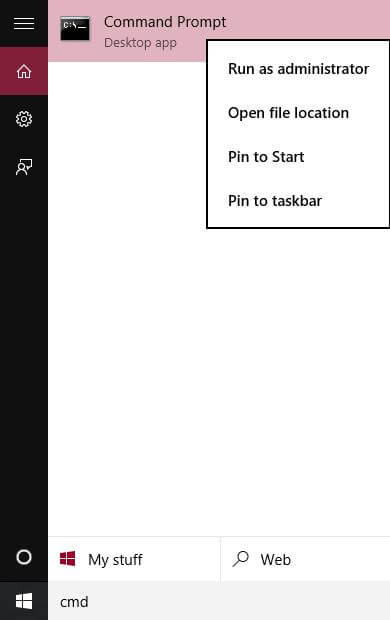
Right-click on the Command Prompt and choose “Run as Administrator.”
It will open Command Prompt with administrative privilege.
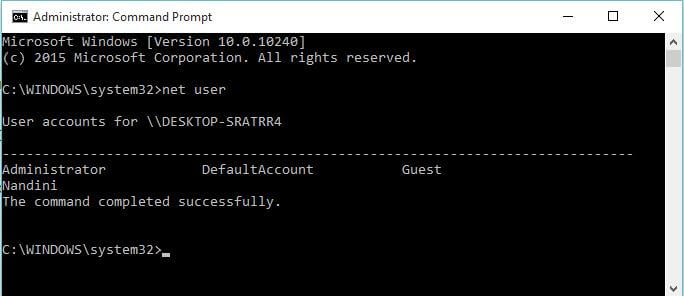
2. Run the following command to list all user accounts:
net user
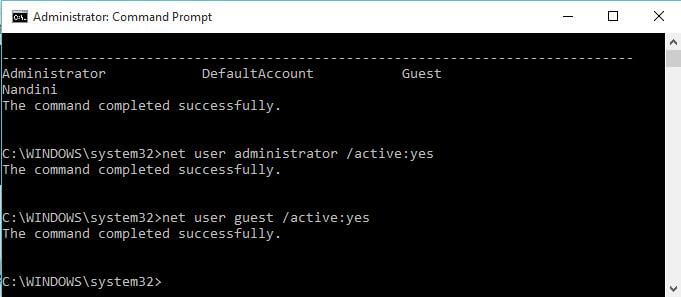
3. To activate the inactive administrator account, run the following command:
net user administrator /active:yes

If you want to enable the guest account as well the run the following command:
net user guest /active:yes
The administrator account is active now, which means you can login into PC with an in-built Administrator account. By default, the built-in administrator account is without the password, and anyone can access the system. It is highly recommended to protect your account with a password. This can also be done on the command line:
To password-protect your administrator account, do the following:
1. Type net user administrator * and hit enter from the keyboard.
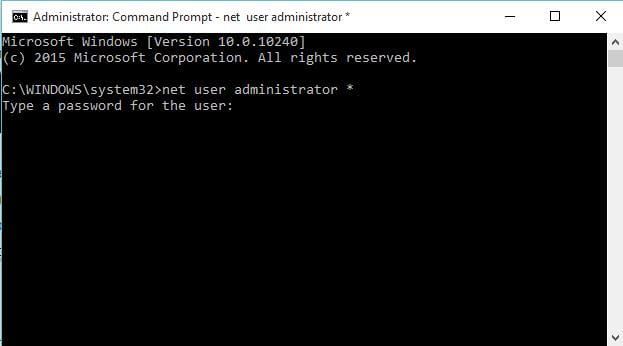 It will prompt for the password, type the desired password, and press Enter from the Keyboard. It will again encourage you to retype the password to confirm.

Note: While typing the password, you will not see any text in the command prompt.
If you want to disable accounts at any time, use the following command:
net user administrator /active:no
net user guest /active:no
For knowledge purposes
Net user administrator command displays information about the administrator user account.
Net user username /delete deletes username on the system; however, it will not work with built-in accounts.
Another way
1. Run command prompt as administrator and issue the following command:
control userpasswords2
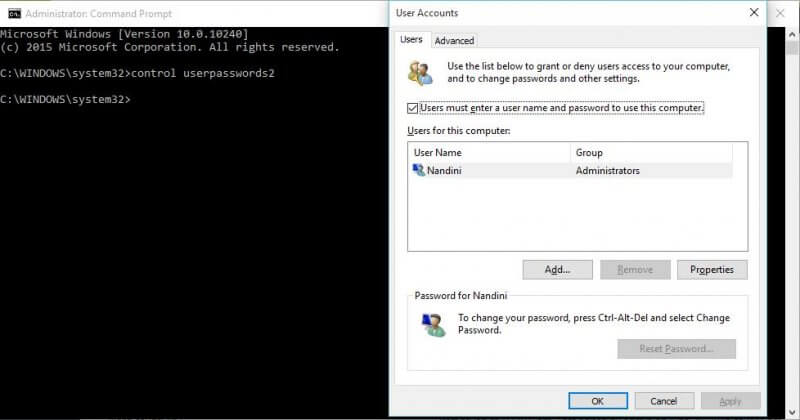
It will open the User Accounts window.
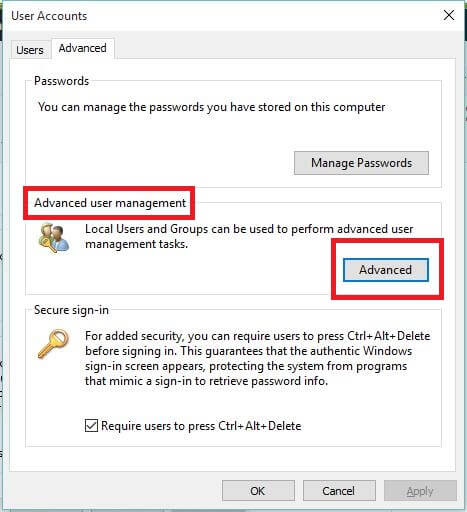
2. Click the Advanced tab.
 3. Under “Advanced user management,” click the Advanced button.
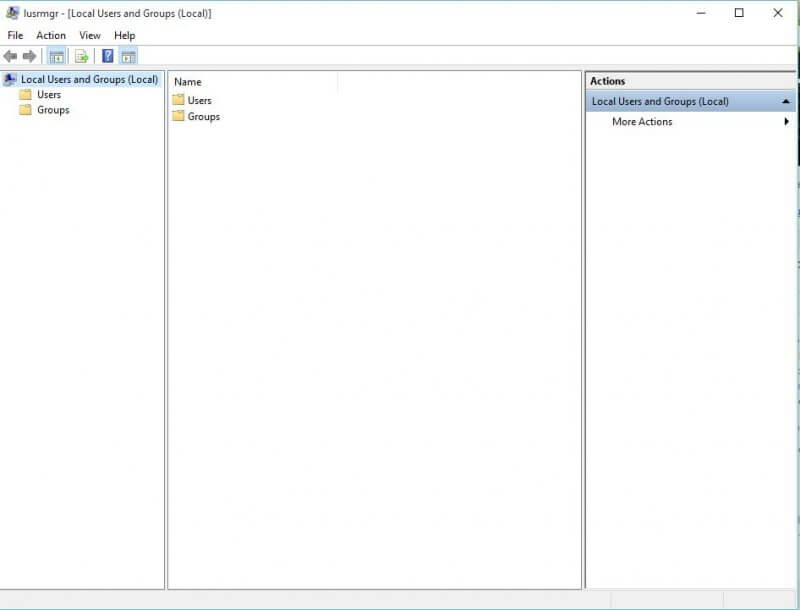
 It will open the “Local Users and Groups” window.
 4. Double click Users.
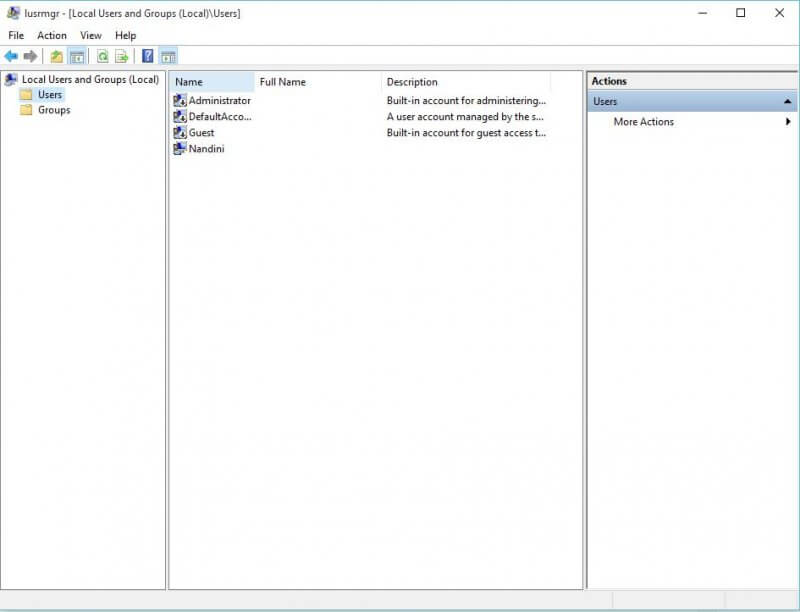 5. From the middle pane, right-click Administrator account.

6. Select Properties.
7. Uncheck “Account is disabled.”
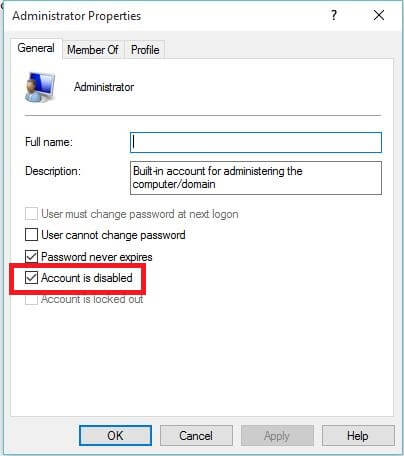
8. Click Apply, then OK.
In similar ways, you can enable or disable the guest account.
Also refer: Ways to Rename built-in Administrator Account of Windows 10 / 8.1 / 8 / 7.


