Windows 10 Anniversary Update v1607 has lots of improvements and new features. One of the new enhancements is Network issues. Now you can fix the network problem and connectivity issues with the click of a button. It is possible to use the Windows 10 Network Reset button to reinstall Network adapters and set networking components to their default settings.
How to Reinstall Network Adapters and Reset Networking Components to default?
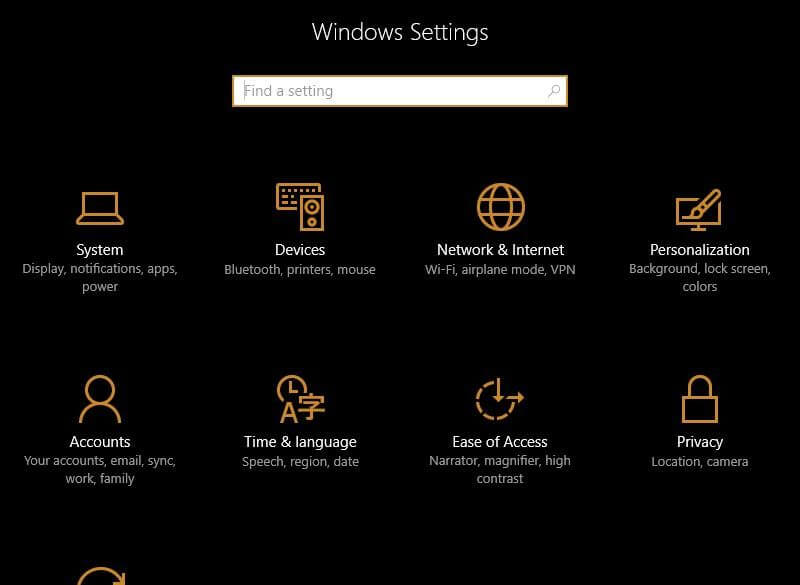
1. Open the Start Menu and click the Settings Icon.
![]()
2. From the Settings app, click on Network & Internet (WiFi, airplane mode, VPN).
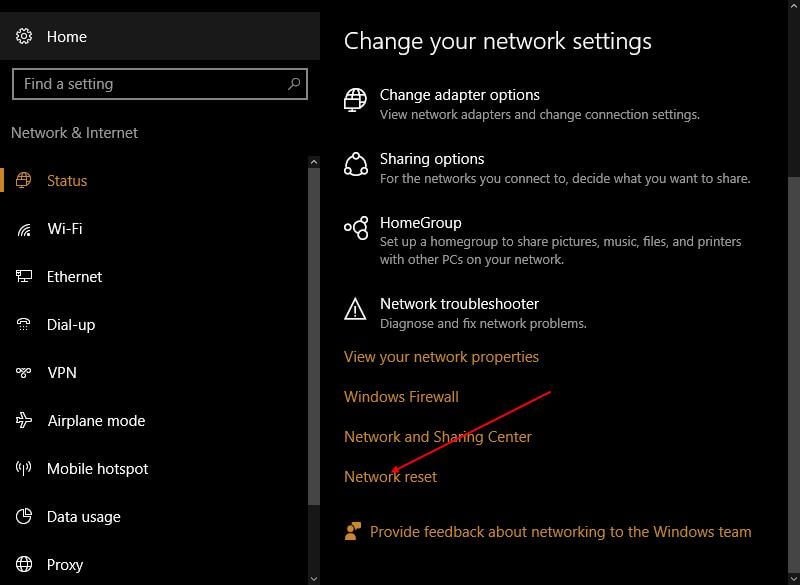
3. From the left side menu, click on the Status.

From the right side pane, you can see the status of your Network.
4. Scroll down to the bottom from the right pane, and click the link “Network reset.”
5. Clicking on it will open the Network Reset window.
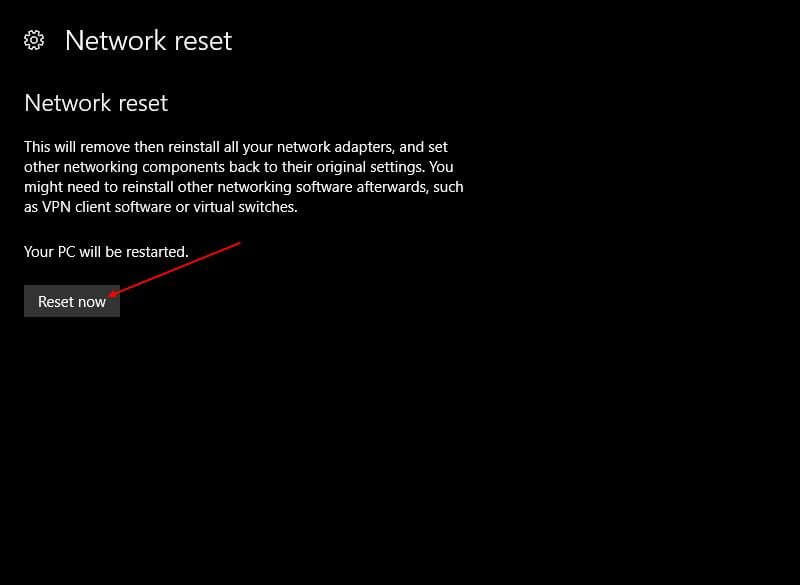 6. Click the “Reset now” button.
Note: Clicking the reset now button will first remove and then reinstall all your network adapters and will set other networking components back to their original settings and default values.
7. Once again, it will ask you for confirmation, click on Yes to proceed, and wait for the task to complete.
Now your Windows 10 computer will be restarted, and will all the network adapters will be set at their default value.
You might be interested in “how to connect any Bluetooth Device with Windows 10?”. You can also fix the Start Menu issues in Windows 10 using PowerShell commands.


