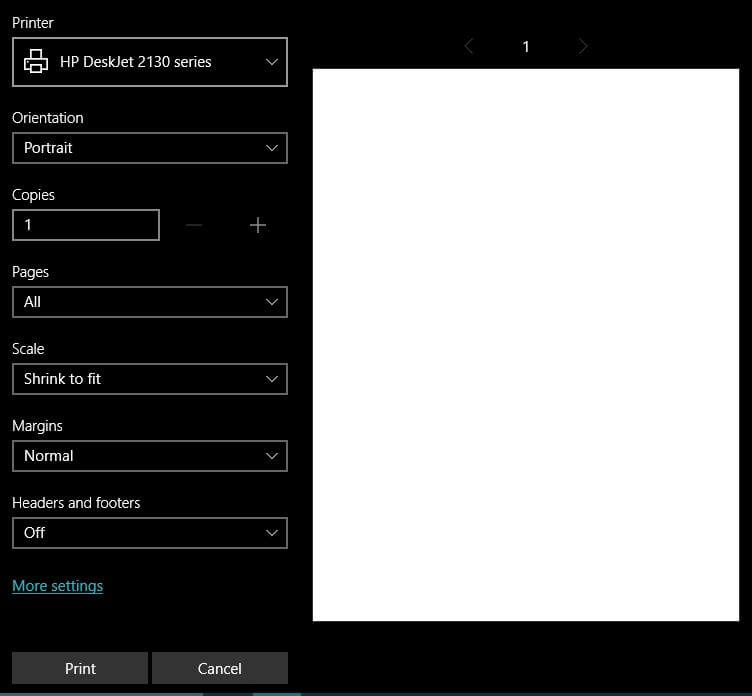
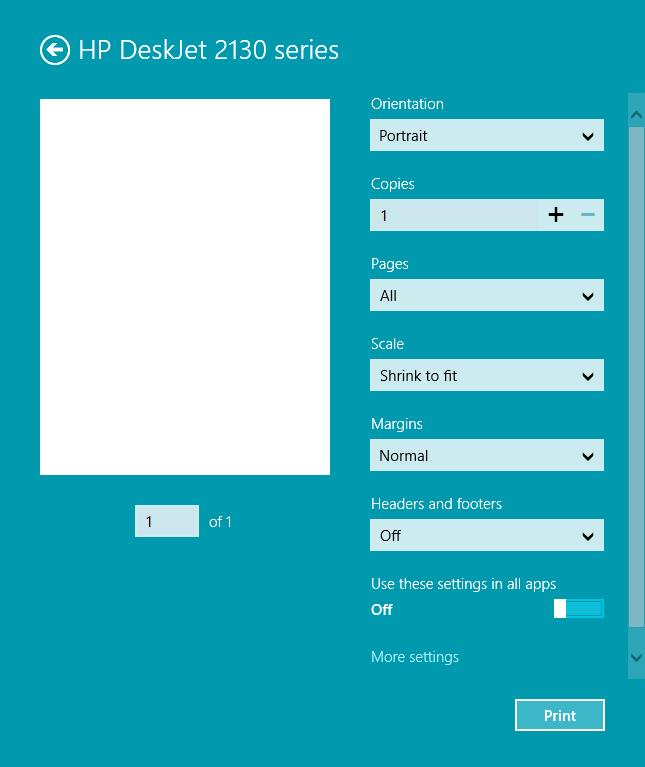
For universal apps of Windows 10, Microsoft has introduced a new print dialog. Unlike Windows 8, which had a print panel slid on the right side, Windows 10 shows a print dialog on top of the app that cannot be moved. If you are missing out Windows 8 print panel in Windows 10, it is possible to get it back with a simple Registry tweak.
Windows 10 print dialog box:
 Windows 8 print dialog box:
How to Enable Windows 8’s Metro-Style Print Panel in Windows 10?
1. Click the Start button and type Regedit in the search box.
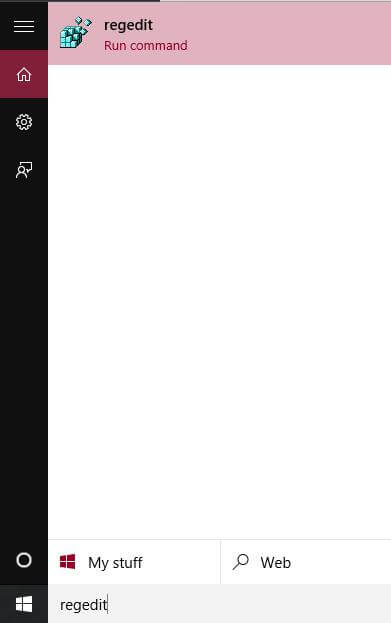
2. From the search results, click on Regedit (run command) to open the Registry Editor.
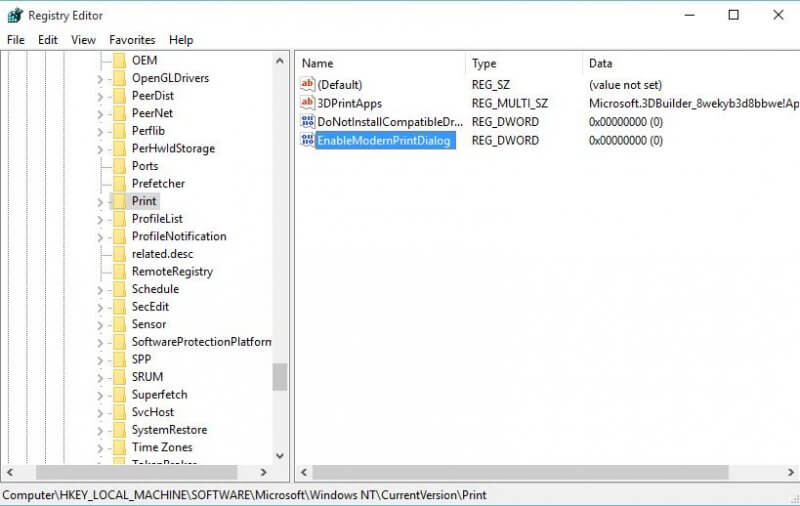
3. Navigate to the following key:
HKEY_LOCAL_MACHINE\SOFTWARE\Microsoft\Windows NT\CurrentVersion\Print
4. Under Print, create a new 32-bit DWORD value and name it EnableModernPrintDialog.
Note: Even if you are running 64-bit Windows OS, you still have to create a 32-bit DWORD value. Leave its default value data as 0.
Note: This tweak will only affect only Universal (Metro) apps and will not change the default Win32 print dialog of classic Desktop apps.
You can also download ready-to-use Registry files.


