Windows 10 comes with a hotspot feature that lets you share your internet connection with other WiFi-enabled devices without installing a third-party Wi-Fi hotspot creating software. After Windows 10 Anniversary Update, Microsoft has made it even easier to create and manage hotspots.
It is useful for those who are still using old data cards, in which a WiFi hotspot facility is not available.
How to Create Mobile Hotspot, Change Hotspot Name & Password in Windows 10?
1. Click on the “Start Orb” and then click on the Settings icon to launch the Settings app.
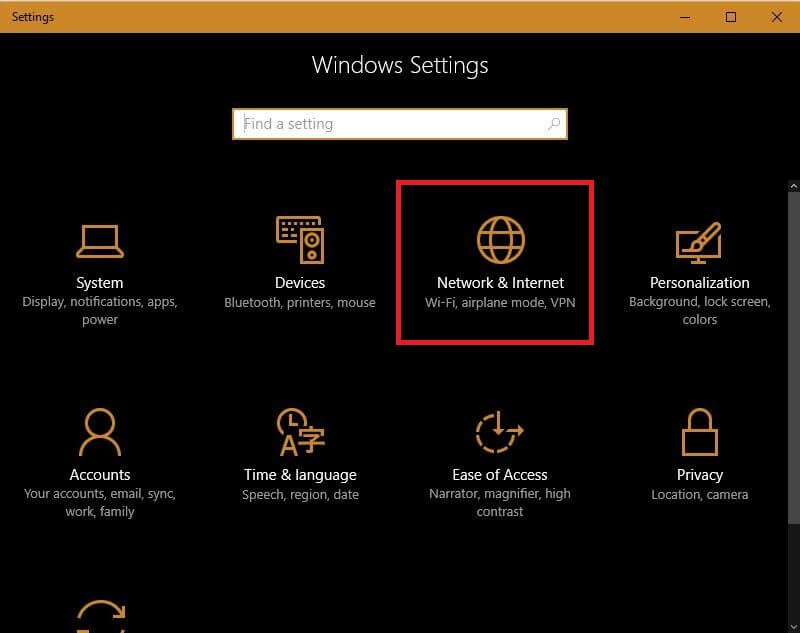
![]() 2. From the Settings App, click Network & Internet (WiFi, airplane mode, VPN).
2. From the Settings App, click Network & Internet (WiFi, airplane mode, VPN).
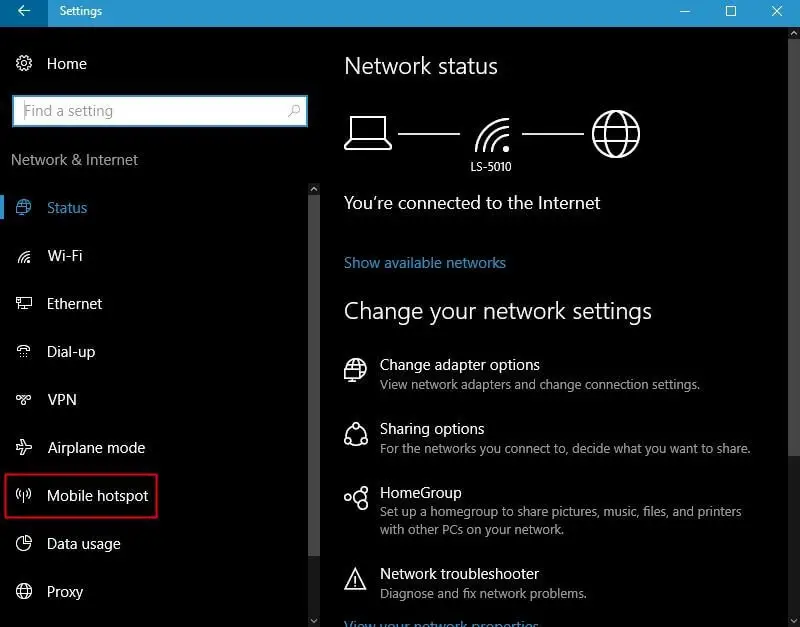
 3. From the left menus, click Mobile Hotspot.
 4. By default Mobile hotspot is Off in Windows 10; click the toggle to turn it ON.
 5. Once the WiFi Hotspot is turned ON, you can connect to the internet through the hotspot of Windows 10, up to 8 WiFi-enabled devices.
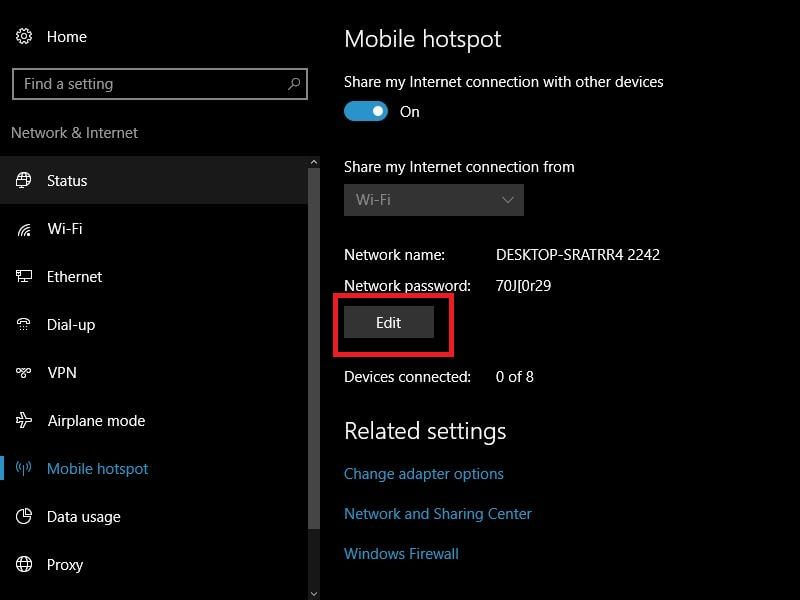
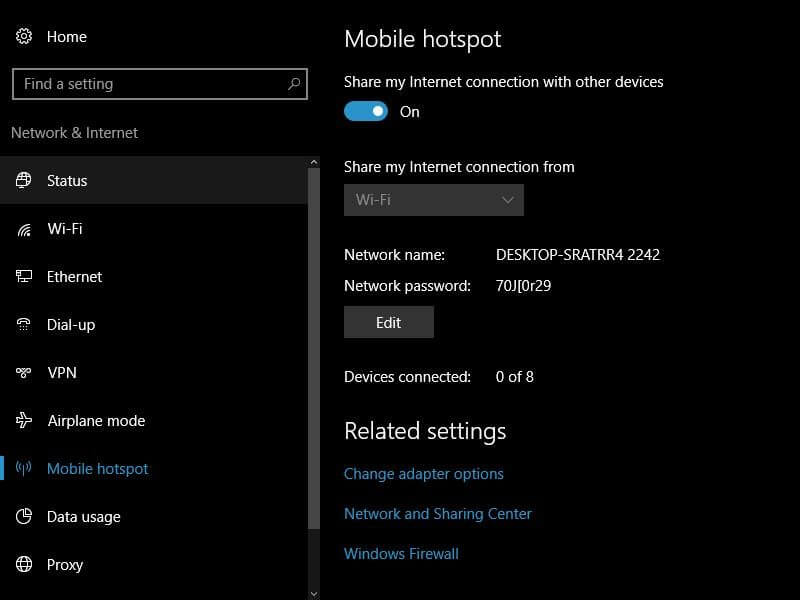 6. By default, the Network SSID name is similar to your PC name, and the app will also provide a default Network password to connect to the WiFi hotspot. To edit the Network name and password, click on the Edit button.
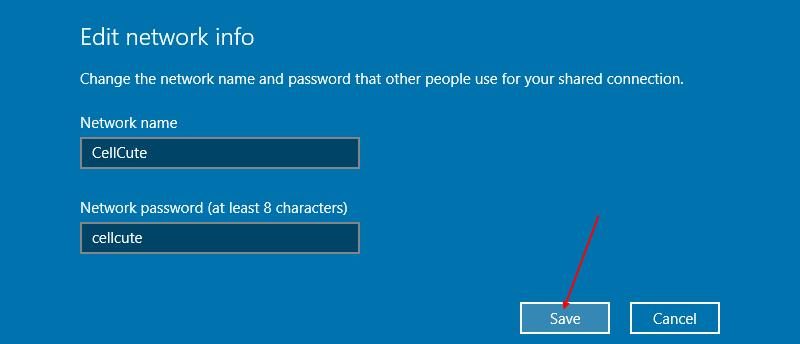
7. An “Edit network info” window will be opened.
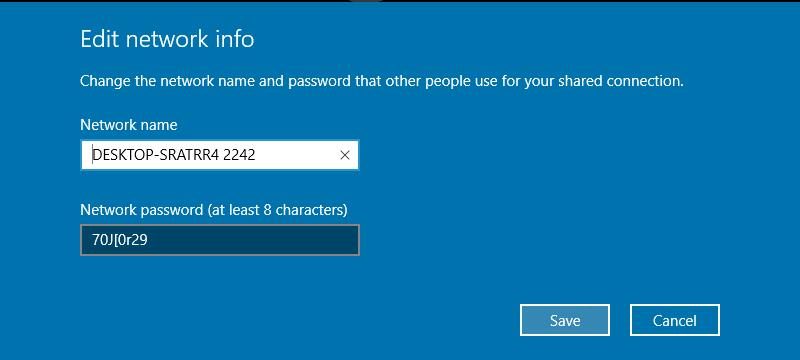 8. Now, you can edit the network name and the network password (should be at least 8 characters).
9. Once you have made the changes, click on the Save button.
 10. Enable the mobile hotspot again, and your computer will start broadcasting the SSID.


