Apple has already renamed its desktop operating system, OS X, to macOS and announced the upcoming macOS Sierra operating system. Registered developers can download and use macOS Sierra, the latest version of macOS.
The macOS Sierra bootable USB drive can be prepared on a Mac PC without the help of any third-party tools. However, if you want to prepare the bootable USB disk from Windows PC, it is also possible to use TransMac.
Requirements to Create macOS Sierra Bootable USB Drive from Windows PC?
- Windows PC running Win 10 / Vista / 7 / 8.
- A USB disk with at least 16 GB of storage
- macOS Sierra DMG (image) file
- TransMac Software (Download link)
Note: TransMac is paid software, but it comes with a trial period of 15 days without any restriction.
How to Create macOS Sierra Bootable USB Drive from Windows PC?
To create a macOS Sierra bootable USB Drive from Windows PC, use these steps:-
Step 1. Connect your USB / Pen drive to your Windows PC.
Note: Copy all the data to a safe place because, during the process, it will be erased.
Step 2. Install TransMac software on your PC.
Step 3. Run TransMac software as administrator.
If you are Windows 10 user, then type TransMac in the Start menu search box, right-click on TransMac from the search results, and then click the Run as administrator option.
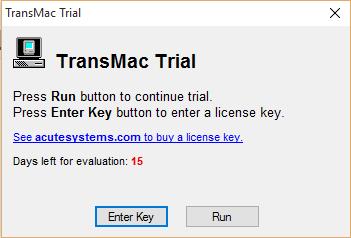
 Step 4. Click the “Run” button to continue with the trial.
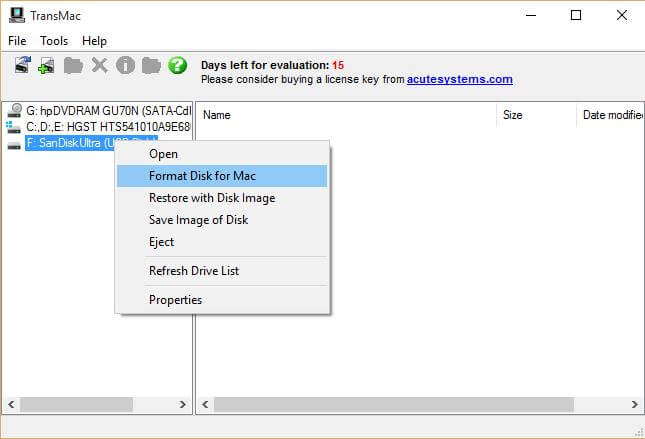
 Step 5. Once TransMac is launched, you can see the connected drives from the left pane of the software. Right-click on the USB drive and then click Format Disk for Mac.
Step 6. A Warning will pop up, “This disk may contain mounted PC volumes. Formatting will overwrite them. Are you sure you want to continue?”
Click Yes.
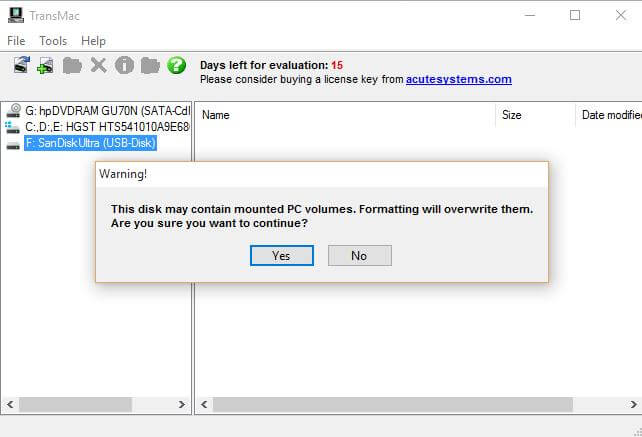
This warning message comes because you have been using a USB flash drive with the Windows operating system; the USB drive is likely using an MBR partition type. So it needs to partition the USB drive with a GPT partition first before transferring the DMG file to the USB drive.
Step 7. Rename the Volume Name and click OK.

Step 8. Again, it will prompt with the warning to overwrite. Click Yes.
Step 9. Wait till the “finish” of formatting the USB disk.
Step 10. You will get a prompt, “Format Complete.” Click OK.
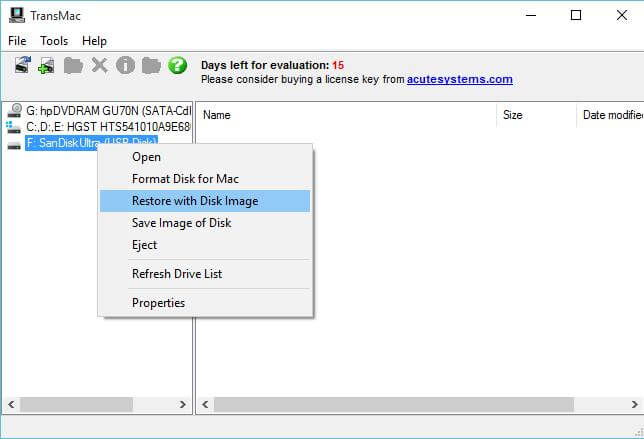
Step 11. Once the formatting is completed, again right-click on the USB drive and then click Restore with disc image.
 Step 12. Click the Yes button when you see the following warning dialog box, “This disk may contain mounted PC volumes. Restoring will overwrite them. Are you sure you want to continue?”
 Step 13. A new dialog box will be opened, “Restore Disk Image to Drive.”
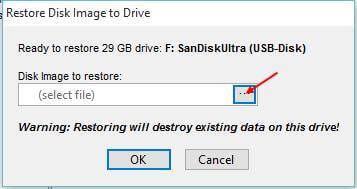
Step 14. Click on (…) and locate the Sierra DMG file.
Step 15. Click OK.
Step 16. A warning dialog box appears; click Yes to begin preparing your macOS Sierra bootable USB.
The bootable USB may take more than 30 minutes. Once the bootable USB of Sierra OS is ready, you can connect it to your Mac device and begin installing macOS Sierra.
Conclusion
In conclusion, creating a macOS Sierra bootable USB drive from a Windows PC is possible with the help of TransMac software. Although TransMac is a paid software, it offers a 15-day trial period without any restrictions. To begin the process, ensure that you have a Windows PC running Win 10/Vista/7/8, a USB drive with at least 16 GB of storage, and the macOS Sierra DMG file. Connect the USB drive to your Windows PC and install TransMac software. Run TransMac as an administrator and format the USB drive for Mac. This step is necessary to convert the partition type from MBR to GPT. Rename the volume name, confirm the overwrite warning, and wait for the formatting to finish. Once formatting is complete, restore the USB drive with the macOS Sierra DMG file. This process may take more than 30 minutes. Once the bootable USB drive is ready, you can connect it to your Mac device and proceed with the installation of macOS Sierra. By following these steps, Windows PC users can create a macOS Sierra bootable USB drive without the need for third-party tools.


