In the dynamic realm of technology, our Windows 11 PCs often run multiple applications simultaneously, even when they’re not actively in use. This can lead to unnecessary resource consumption and decreased battery life. Fortunately, Windows 11 offers a simple yet powerful solution—Sleep Mode—to optimize performance and conserve energy. In this user-friendly guide, we will take you through the step-by-step process of putting apps to sleep in Windows 11, allowing you to reclaim resources and maximize efficiency.
Understanding the Benefits of Sleep Mode in Windows 11
Sleep Mode is a valuable feature that preserves battery life, improves system performance, and minimizes resource usage. By putting your computer and apps to sleep after a period of inactivity, Windows 11 ensures that unnecessary background processes don’t drain system resources, enabling a smoother and more efficient computing experience.
Accessing Sleep Settings in Windows 11
To access the Sleep settings in Windows 11, follow these straightforward steps:-
Step 1. Press the Windows key on your keyboard or click on the Start button to open the Start menu.
Step 2. Select the gear-shaped Settings icon to open the Settings app.
Step 3. Within the Settings app, click on “System” to access system-related settings.
Step 4. From the right-hand menu, choose the “Power & sleep” option to access the power and sleep settings.
Customizing Sleep Options in Windows 11
Once you’re in the “Power & sleep” settings, you can customize the Sleep options according to your preferences:-
Step 1. Adjust the “On battery power” settings: Determine the duration of inactivity before your PC goes to sleep when running on battery power. Use the provided drop-down menus to select the desired time interval.
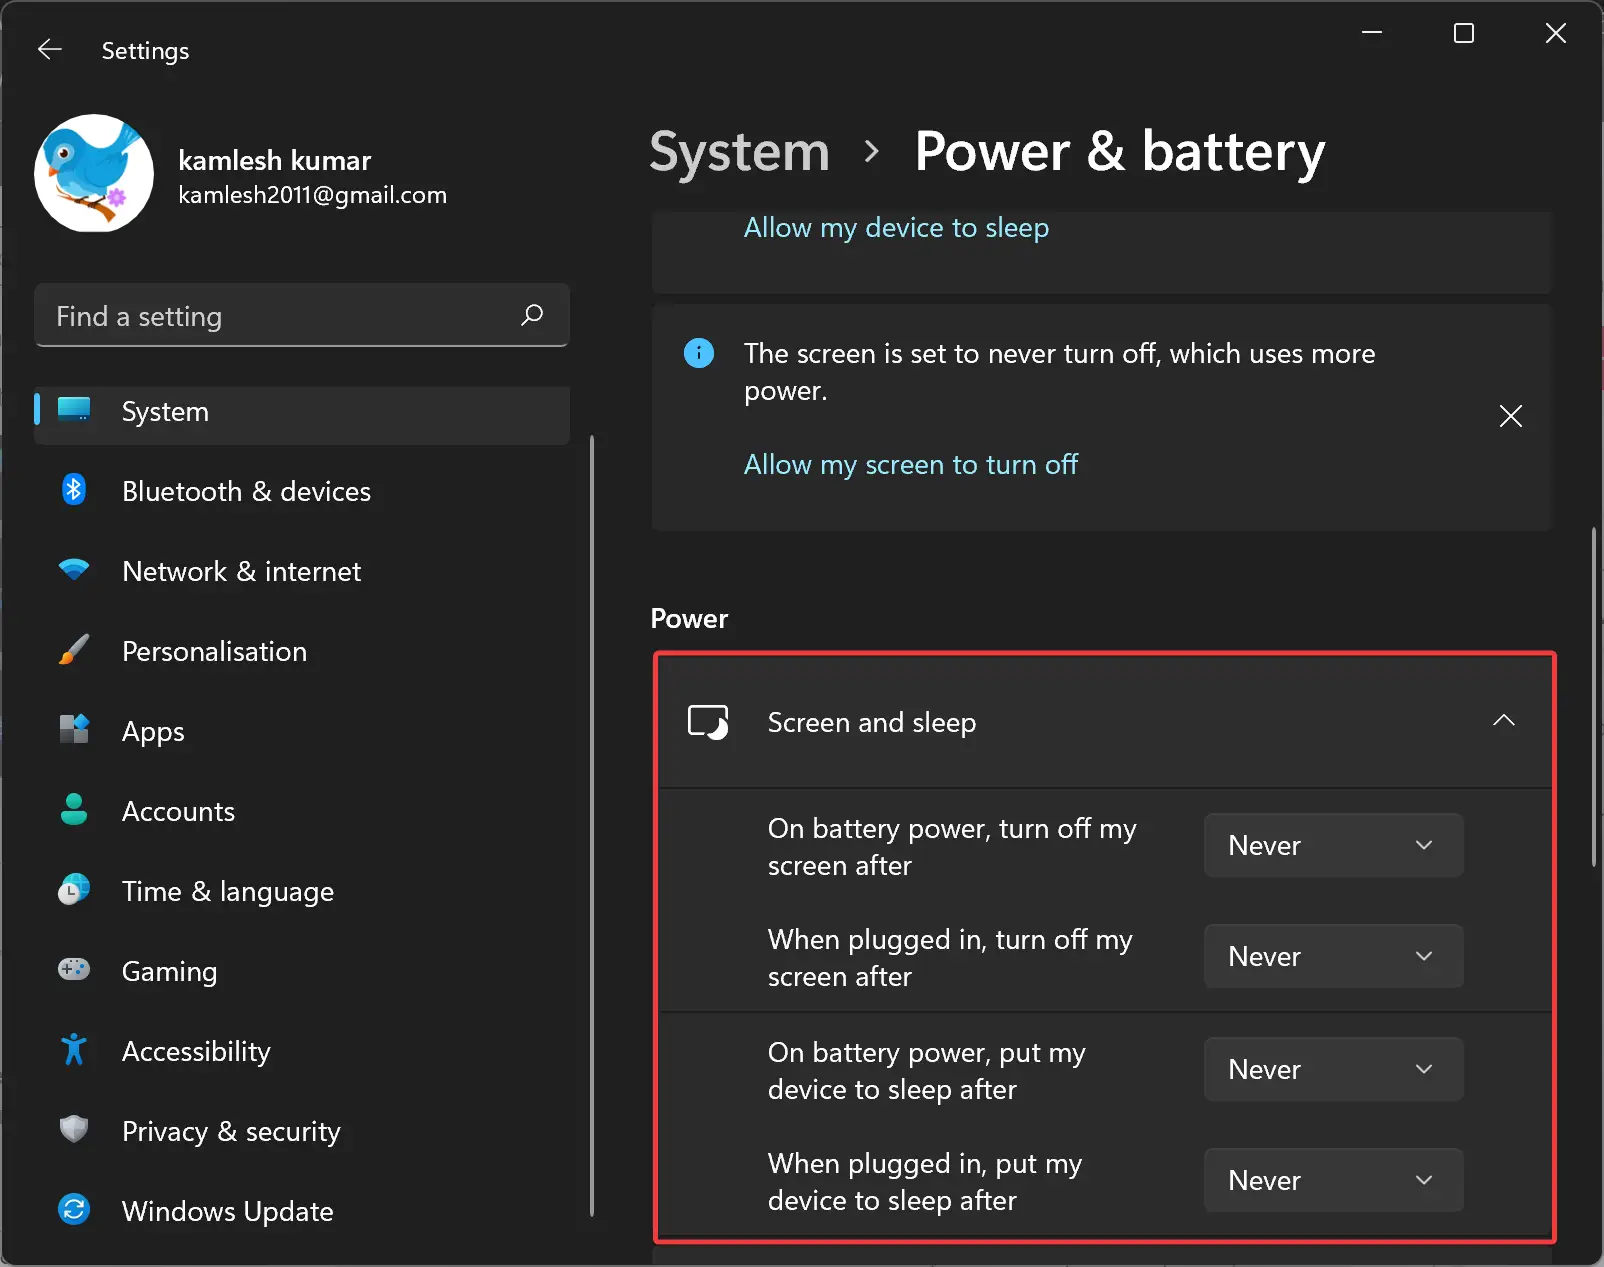 Step 2. Customize the “When plugged in” settings: Similarly, specify the inactivity time required for your PC to enter sleep mode when connected to a power source. Utilize the drop-down menus to set the preferred time interval.
By customizing these Sleep options in Windows 11, you can ensure that your PC conserves energy and resources effectively during idle periods, promoting enhanced efficiency and prolonged battery life.
Putting Apps to Sleep Mode in Windows 11
To put apps to sleep in Windows 11, follow these user-friendly steps:-
Step 1. Open the Settings app on your Windows 11 PC by pressing the Windows key and clicking on the gear-shaped Settings icon.
Step 2. In the Settings app, select “Apps” from the available options.
Step 3. Click on “Installed apps” to view the list of applications installed on your PC.
 Step 4. Locate the app you wish to put to sleep and click on the three-dots menu beside it to access its settings.
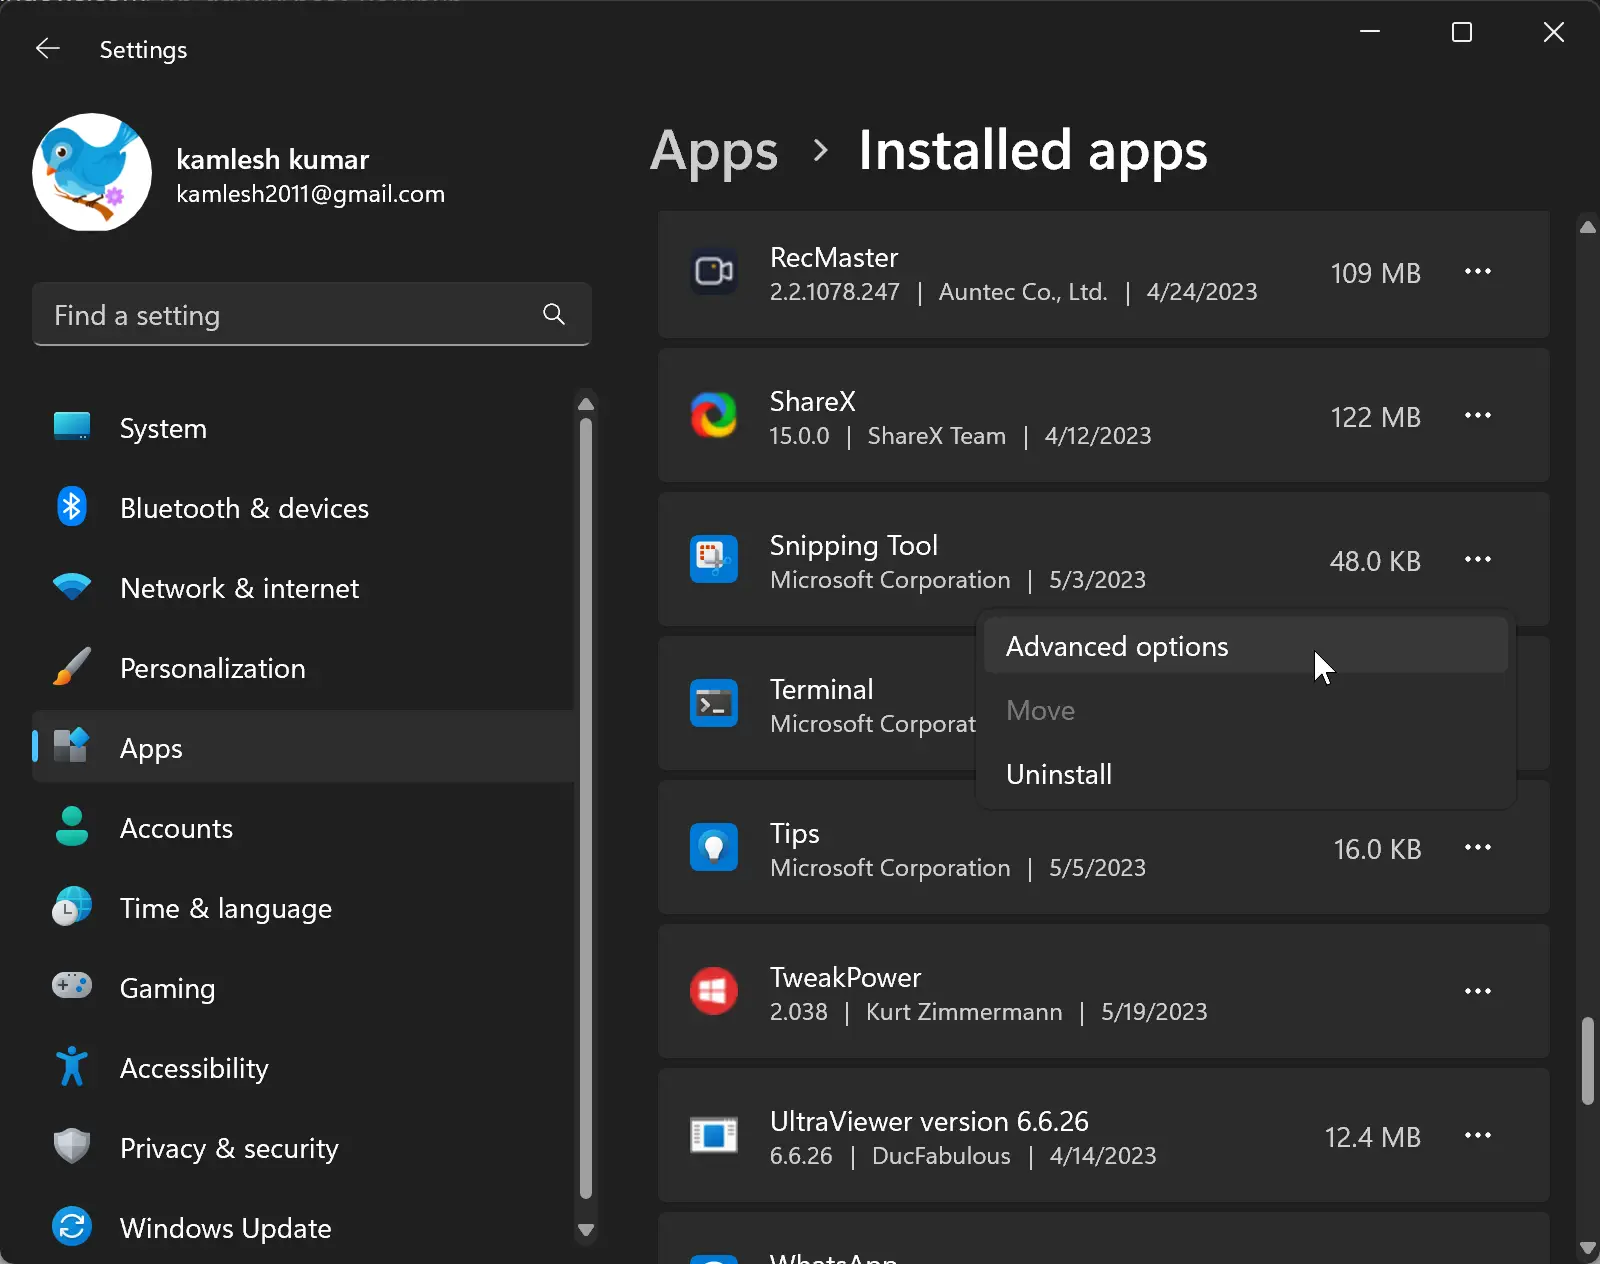 Step 5. Within the app’s settings, look for the “Advanced options” option and click on it.
Step 6. Scroll down until you find the “Let this app run in the background” setting and select “Never.”
 By disabling the “Let this app run in the background” setting, you effectively put the selected app to sleep, preventing it from consuming system resources when not actively in use.
Optimizing Efficiency with App Sleep Mode
Putting apps to sleep is just one aspect of optimizing efficiency in Windows 11. To further enhance performance, consider reviewing the list of installed apps on your PC. Identify any unnecessary or resource-intensive apps that you rarely use and consider uninstalling or disabling them. This proactive app management approach will help streamline your PC and free up resources for the apps you use most frequently.
Conclusion
By harnessing the power of Sleep Mode in Windows 11 and putting apps to sleep, you can reclaim valuable system resources, extend battery life, and unlock a more efficient computing experience. Windows 11 provides a user-friendly interface to customize Sleep settings and easily manage app sleep mode. Implementing these steps will ensure your PC operates at its best, allowing you to maximize productivity and enjoy a more seamless computing journey.


