Microsoft had introduced UAC (User Account Control) feature in Windows Vista that helps you stay in control of your computer by informing you when a program makes a change requiring administrator-level permission. UAC works by adjusting the permission level of your user account. If you’re doing tasks that can be done as a standard user, such as reading e‑mail, listening to music, or creating documents, you will have the permissions of a standard user—even if you’re logged on as an administrator.
But, when changes are going to be made to your computer, that requires administrator-level permission, and UAC notifies you. If you have logged in as Administrator on your PC, you can click Yes to continue. If you are not an administrator, you have to provide an administrator account password on the computer to access those applications. If you give permission, you are temporarily given an administrator’s rights to complete the task, and then your permissions are returned to that of a standard user.
It can help prevent malicious software (malware) and spyware from being installed or making changes to your computer.
How to disable UAC in Windows Vista, Win 7, Win 8, & Win 10?
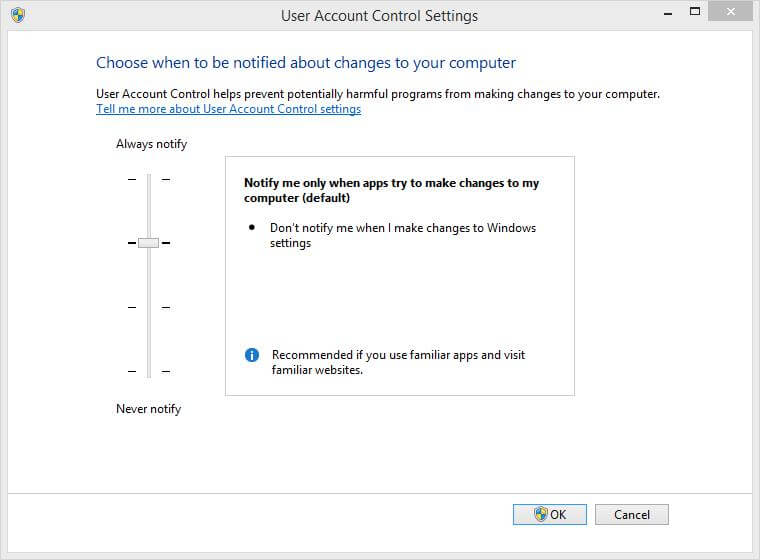
Open up Control Panel and type in “UAC” into the search box. You’ll see a link for “Turn User Account Control (UAC) on or off / Change User Account Control Setting.”
 Click on the link, and it will open up UAC settings. Just drag the Notification level to Never Notify and apply the setting. It may ask you to reboot the PC to regularize the setting. Restart the PC, and you have successfully disabled the annoying UAC.


