With the default settings, Windows 10 automatically downloads and installs all the updates, which Microsoft releases. Whenever you install a major update of Windows 10 or upgrade to the latest build of Windows 10, you have to manually delete some files and folders, which are unnecessarily occupying the hard disk space on your computer, to regain lost disk space due to the update. You likely know that you can free up GBs of space by deleting Windows.
You can free up GBs of space by cleaning your Windows.old folder from your operating system.
How to delete the temporary Windows installation files from Windows 10?
Whenever you update your operating system, a temporary Windows installation folder is created, which is different from temporary files/folder and Windows.old. Deleting this temporary folder from your computer will not delete your operating system, which means it is safe to delete.
1. Open up “This PC” or “Quick Access” by pressing Windows Logo + I keys from the keyboard.
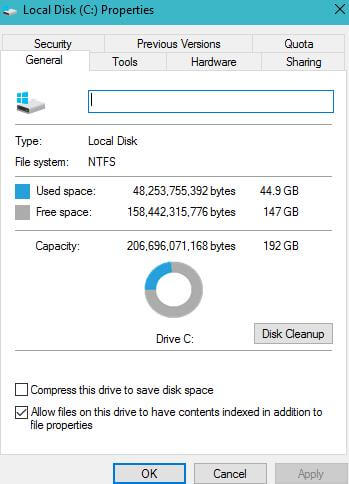
2. Right-click on your Windows 10 installation drive (usually, C: drive) and select Properties.

3. From the General tab, click the Disk Cleanup tool. It may take a few minutes to show files and folders that can be safely deleted.
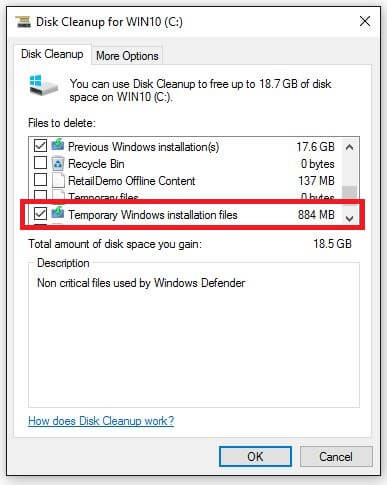
 4. Select the entry named Temporary Windows installation files, and then click the OK button to delete the temporary Windows installation files.
 If you have freeware like CCleaner and Glary Utilities, you don’t have to worry about these temporary Windows installation files. It will keep cleaning your computer whenever you will run.


