Installation of Windows OS from the USB disk is quite popular now. You can use the Windows Installation Media Creation Tool to create a Windows 8.1 USB disk. Windows 10 Media Creation tool lets you create Windows 10 USB/DVD. It is also possible to create a Windows 10 USB disk using the command prompt. Once you have prepared a bootable USB / DVD, you can check whether it is bootable or not using MobaLiveCD.
Rufus is the most popular tool for creating a bootable USB disk for Windows 10, 8, 7, Vista, and XP. But, in this post, we’ll prepare a USB drive using Windows USB/DVD Download Tool. When you install Windows USB/DVD Download Tool and run it on your PC, you will find Windows 7 USB/DVD download tool, don’t worry; it works well with Windows 7, 8 & 10.
Before you proceed with creating a USB installation drive, you’ll need to have your Windows installation media available as an ISO file. You can download an ISO file of the preferred operating system using Windows and Office ISO Downloader Tool. It is also possible to download the latest Windows 10 ISO Disc Image files from the Microsoft site.
Apart from the ISO image, you need a minimum of a 4GB flash drive to create your installer media. During the bootable USB creation process, it will erase your whole USB drive, so before processing, copy the important data to your hard drive or PC. Once you have both ISO and flash drive in hand, you’re ready to continue.
How to Create a USB Flash Drive Installer for Windows 10, 8, or 7?
To make a USB Flash Drive installer for Windows 10, 8, or 7, use these steps:-
Step 1. Navigate to this page, and click on the download button to download the
Windows USB/DVD Download Tool.
Step 2. Install it on Windows PC and launch the same.
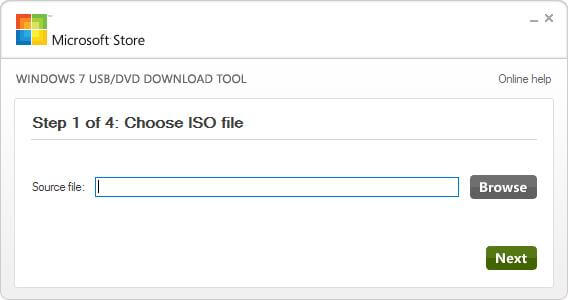
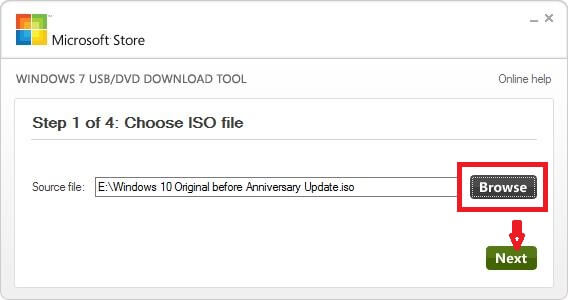
Step 3. Click “Browse” to locate your Windows ISO file, and then click “Next” to proceed further.
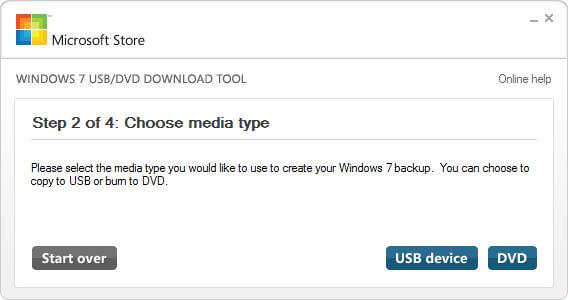
 Step 4. On the next screen, you will have two options, a USB device, and a DVD. Since we are creating a bootable USB disk, we will click the USB device option.
 Step 5. Insert the external USB disk and click the USB device. It will automatically detect.
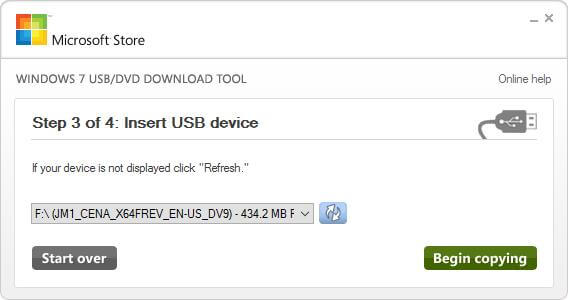
Step 6. Click “Begin copying.”
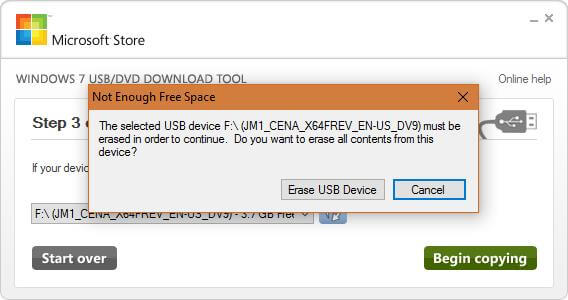
Step 7. It will prompt you to Erase the USB Device. Click “Erase USB Device” to continue.
 Step 8. It will again ask you before erasing the USB disk, click Yes.
 Step 9. You will see a status Formatting.
 Step 10. Once formatting is completed, it will start copying the files.
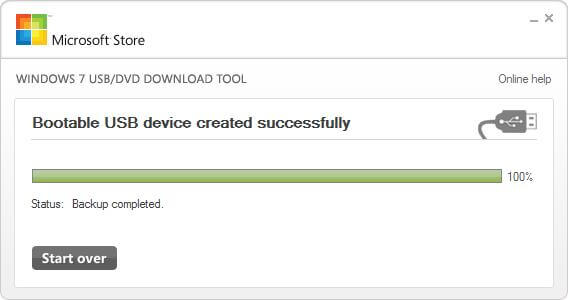
 Step 11. It will take a few minutes, depending on the USB disk and PC speed. Once the copying of files is completed, you will see a message “Bootable USB device created successfully.”
 Once you have successfully created a bootable USB device, make the appropriate BIOS changes to boot from USB and start installing Windows OS.
Conclusion
In conclusion, creating a bootable USB drive for installing Windows operating systems has become a popular method. By using tools like the Windows USB/DVD Download Tool, you can easily prepare a USB installation drive. It is important to have your Windows installation media available as an ISO file, which can be downloaded using the Windows and Office ISO Downloader Tool or directly from the Microsoft website. Additionally, you will need a minimum of a 4GB flash drive for the installation process. Following the steps provided by the Windows USB/DVD Download Tool, you can create a bootable USB drive with ease. Once created, ensure your BIOS settings are adjusted to boot from the USB drive and proceed with installing Windows OS.


