Disk Cleanup is an essential maintenance tool that comes as a part of the Windows operating system. The Disk Cleanup tool allows you to free up hard drive space, unnecessary and occupying the space. This tool quickly finds and deletes the temporary files such as previous Windows installation files and updates, which are not required further by your computer.
Yet, in Windows 10, Microsoft has not improved it, and you have to run it manually to clean your hard disk. In this post, we will see how to run the disk cleanup tool automatically to clean your computer.
How to automatically clean hard drive space with the Disk Cleanup tool?
1. Right-click on the start menu and select Command Promot (Admin),
or press Windows Logo + X key from the keyboard to open the Power User menu and select Command Prompt (Admin).
2. Type the following command and press Enter from the keyboard:
cleanmgr /sageset:11
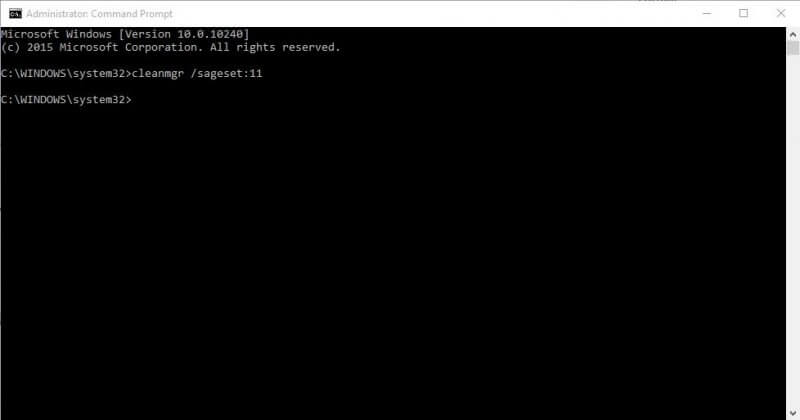
The above command (switch /sagest:n) is to open the Disk Cleanup settings and at the same time creates a registry key that is used to store the settings you choose. You can use anything from 0 to 65535 for n value. It is basically like a filename that points to all the specific settings you want to use. This way, you can set different numbers to run the tool with different settings at different times. This is useful if you want to automate different types of settings at different times.
3. “Disk Cleanup Settings” will be opened.
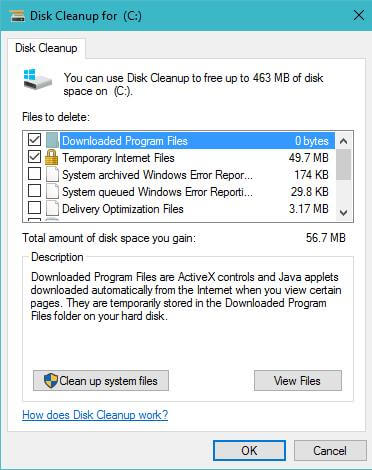
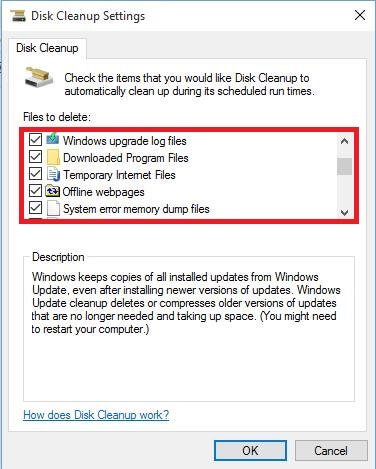
Check the files you want to remove automatically from your system. You can choose from a huge list:
- Temporary Setup Files
- Old Chkdsk files
- Setup log file
- Windows Update Cleanup
- Windows Defender
- Windows upgrade log files
- Downloaded program files
- Temporary internet files
- Offline web pages
- System error memory dump file
- System error minidump files
- Files discarded by Windows Upgrade
- Branch Cache
- Recycle Bin
- Temporary Files
- Temporary Windows installation files
- Thumbnails
- User files history
- Windows ESD installation files
4. Once appropriate files are selected, click the OK button.
Settings will be saved and stored in the registry.
5. Click on the Start button from the Taskbar and search for Task Scheduler.
6. From the results, click on Task Scheduler to open this utility.
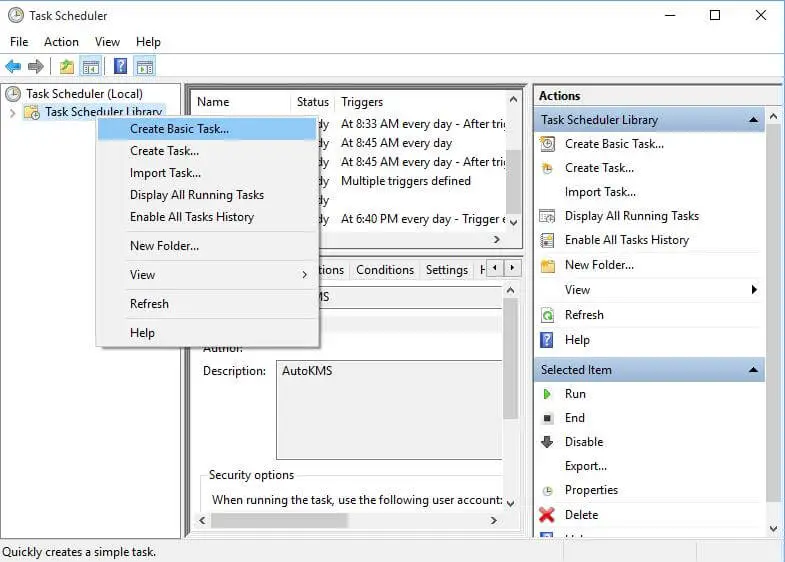
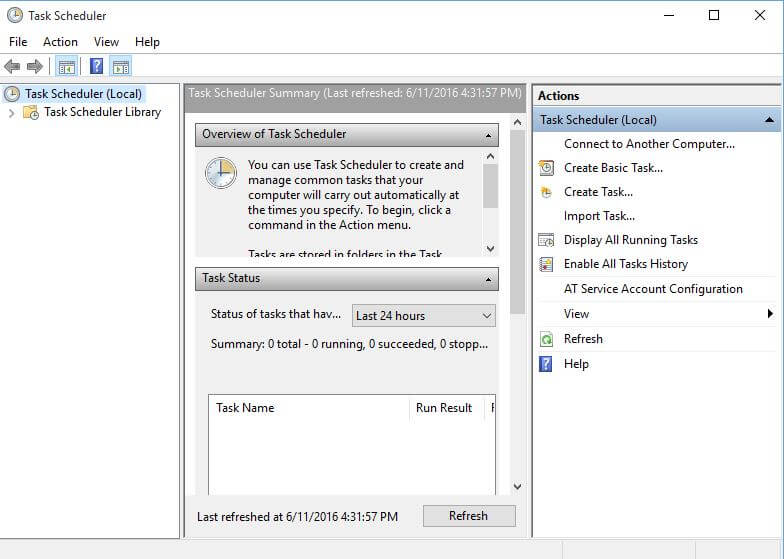 7. Right-click on Task Scheduler Library from the left pane and select “Create Basic Task.”
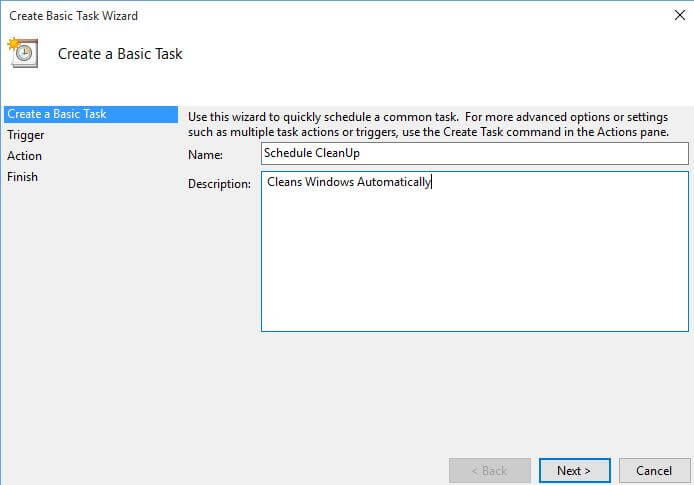
 8. Name the new task, add a description, then click Next.
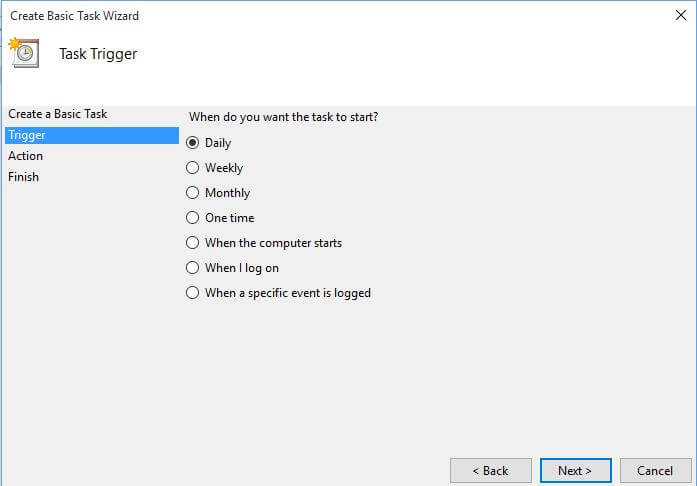
 9. Select the schedule when you want to run this utility. You can choose from Daily, Weekly, Monthly, ‘One time,’ ‘When the computer starts,’ ‘When I log on,’ and ‘When a specific event is logged.’
10. Click Next.
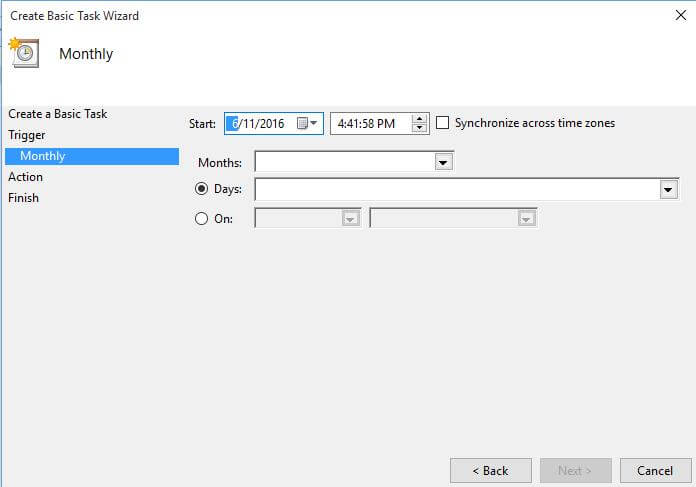
11. Select the date and time when you want to run this tool.
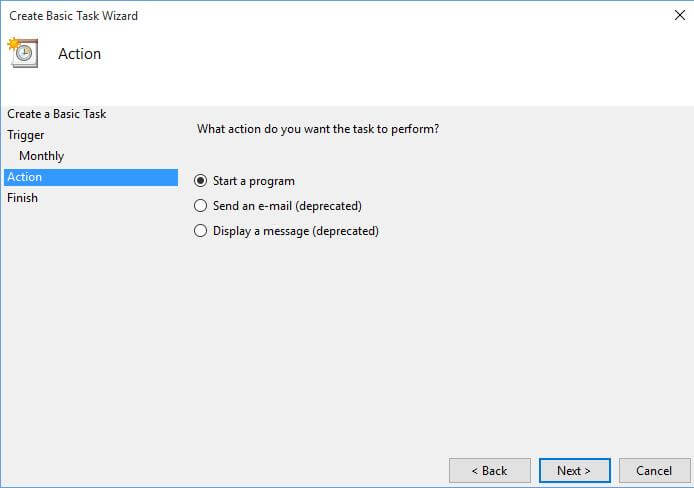
 12. Choose ‘Start a program’ and click Next.
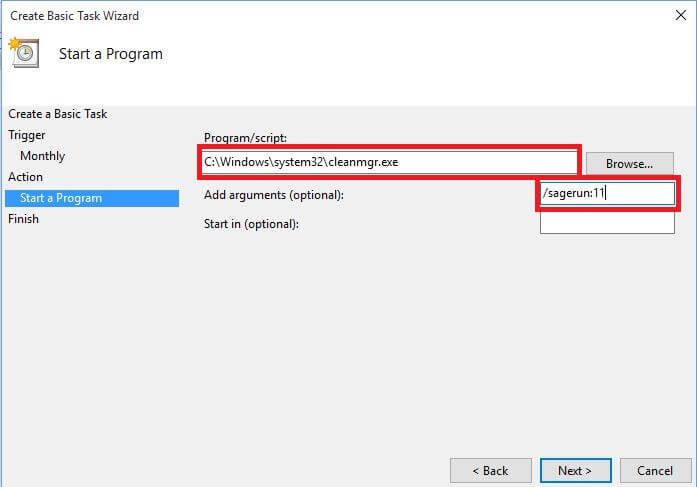
13. Under ‘Program/script’ box type the path of the Disk Cleanup tool: C:\Windows\system32\cleanmgr.exe and in the ‘Add arguments” type the /sagerun:11.
Note: Change the number 11 to the number you have used in step 2.
14. Click Next.
15. Click Finish.
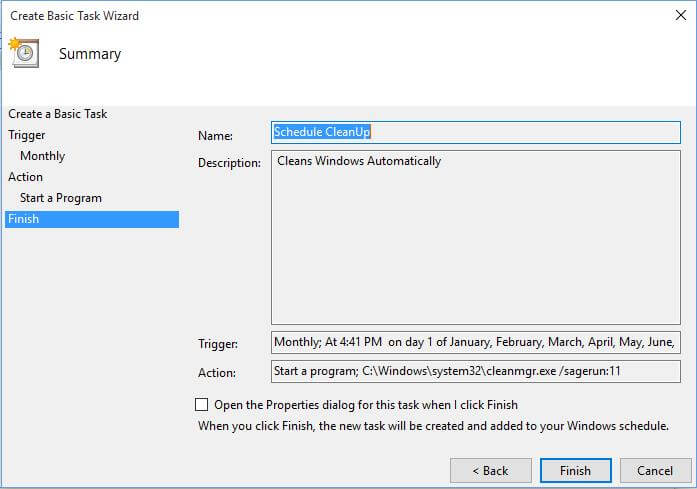
Once you have successfully created the task, the Disk Cleanup tool will run at the specified time. It will delete all unnecessary files from your computer.
If you want to run it manually at any time, type of the following under command prompt (Admin) :
C:\Windows\system32\cleanmgr.exe /sagerun:11
Note: Change the path of cleanmgr if you have installed your Windows OS other than C: drive. You also have to change the number 11 if you have used any other than this in Step 2 above.
If you don’t want to go with a so much long process, install a disk cleanup utility and let it work for you. CCleaner is Glary Utilities, the popular freeware that can be trusted.


